
When a toy project begins, most teams naturally focus on the product itself:
- What should it look like?
- How should the function work?
- Can all components fit inside the housing?
- How should the mold be designed?
- Can the target cost be achieved?
But there are two questions that are often left until much later:
- Does the product need a Try Me function while it is still inside the packaging?
- Will the product use a window box, display box, open box, or another presentation-focused packaging format?
At first glance, both questions sound like packaging decisions.
In reality, they can directly affect the electronics, firmware, mechanical structure, and even the mold design.
If these requirements are only raised after the product structure has been frozen and the tooling is already completed, what looked like a small packaging request can quickly turn into a serious engineering problem.
1. A Try Me Function Is More Than Just a Hole in the Box
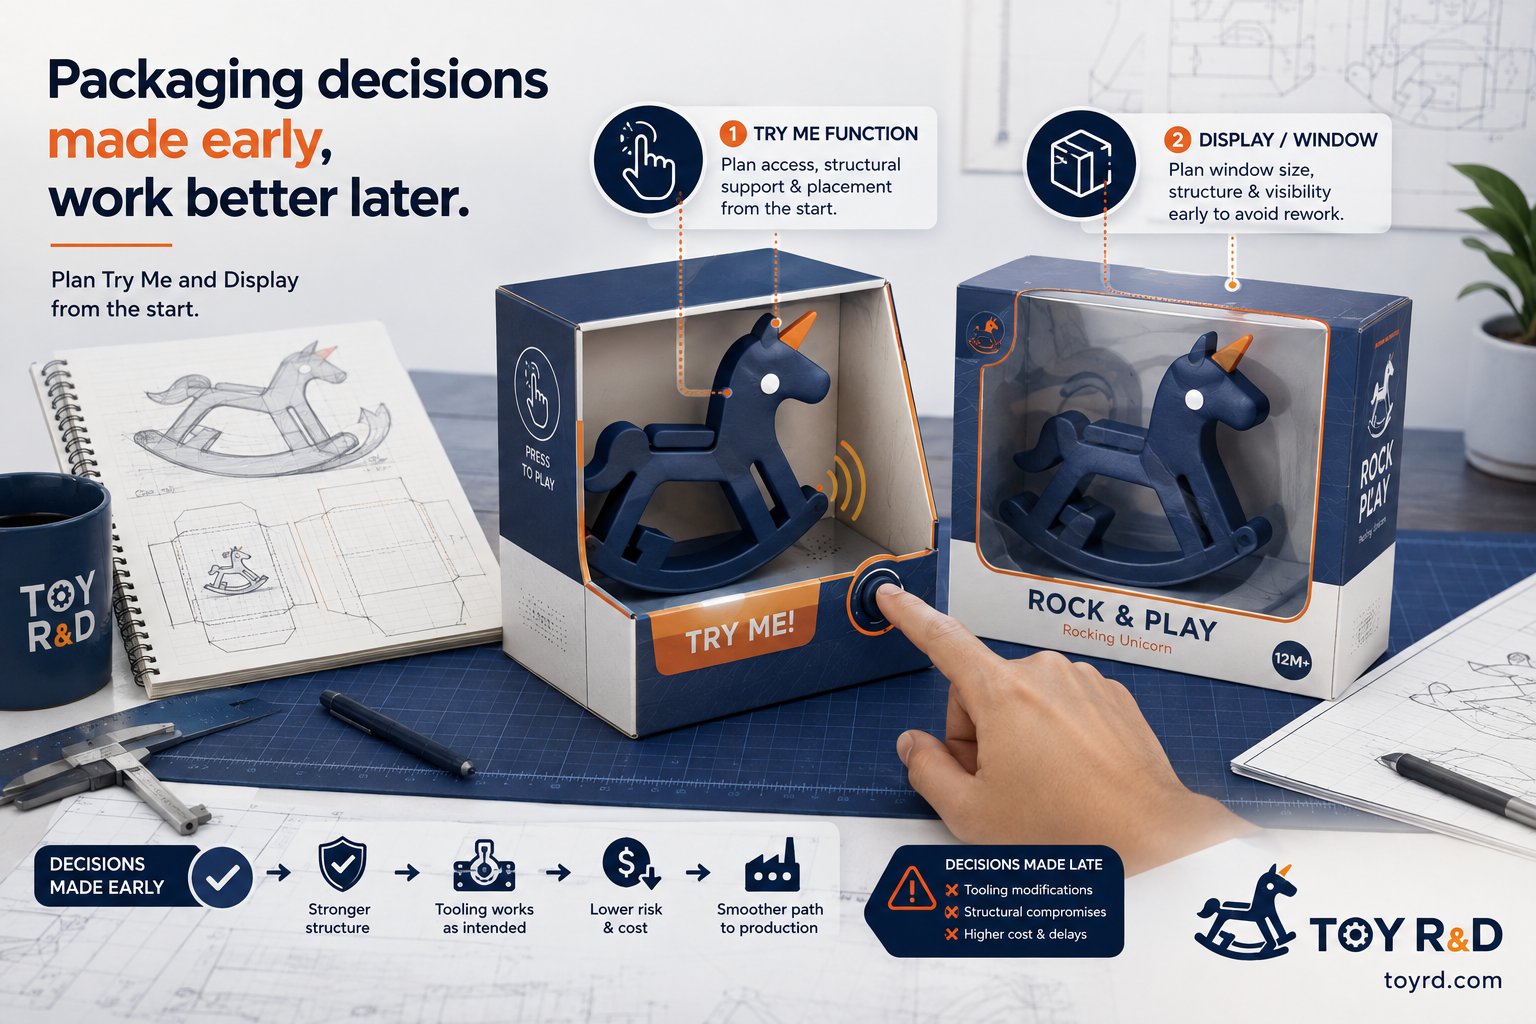
Many electronic toys are designed so consumers can experience a key feature without removing the product from the package.
For example, the shopper may be able to:
- press a button to hear a sound,
- activate a light,
- trigger a motion,
- play a short demo,
- or experience the product’s main selling point.
This is commonly known as a Try Me function.
At first, the requirement may sound simple:
Just open a hole in the packaging so the customer can press the product button.
But in real product development, it is rarely that simple.
The button location has to work with the packaging
If the main button is located on the back, underneath the product, or in an area that becomes inaccessible once the product is secured inside the package, the packaging team may have no practical way to expose it.
At that point, the project may need to:
- move the button,
- add a dedicated Try Me button,
- modify the PCB,
- add wiring,
- add a secondary trigger mechanism,
- or route a cable from the product to a button mounted on the package.
A requirement that originally sounded like a packaging detail has now started to affect the electronics and mechanical design.
2. Try Me Mode May Also Require Dedicated Firmware or Hardware Logic
There is another issue that is easy to overlook:
The behavior of a toy in retail display mode is often different from its behavior during normal use.
For example, in normal operation, pressing a button may trigger a full song, a long lighting sequence, or a complete movement cycle.
But in a retail store, customers may press that button repeatedly throughout the day.
If the toy always runs its full sequence, the batteries may drain before the product is even sold.
For that reason, some toys are designed with dedicated modes such as:
- Try Me Mode,
- Demo Mode,
- Short Play Mode,
- or a switch between display mode and normal use mode.
That means the product may need dedicated firmware logic from the beginning.
In some cases, the hardware architecture also needs to support this mode.
From a ToyRD product-development perspective, Try Me should therefore not be treated as a packaging-only feature.
It is better understood as a system-level requirement that connects the product, electronics, firmware, mechanical structure, and packaging.
3. Window Boxes and Display Packaging Can Change the Product Structure
The second issue is the packaging format itself.
If a toy is packed inside a fully closed carton, there is often more flexibility in how the product is restrained internally.
But if the product uses:
- a window box,
- a display box,
- an open box,
- or another semi-open retail presentation,
the situation becomes very different.
The product is visible to the customer and may even be partially accessible.
Its position inside the package therefore needs to remain stable during transportation, handling, and retail display.
This creates a practical engineering question:
How will an irregularly shaped toy actually be fixed inside the packaging?
Toy products are often far from rectangular.
They may have curved bodies, protruding parts, soft components, wheels, handles, or other unusual geometry.
A simple inner tray may not be enough.
Possible fixing methods may include:
- cable ties,
- molded trays,
- cardboard restraints,
- plastic clips,
- screws,
- or dedicated packaging fixation points on the product itself.
And this is where packaging can begin to affect the mold.
4. A Small Packaging Screw Can Change the Mold Design
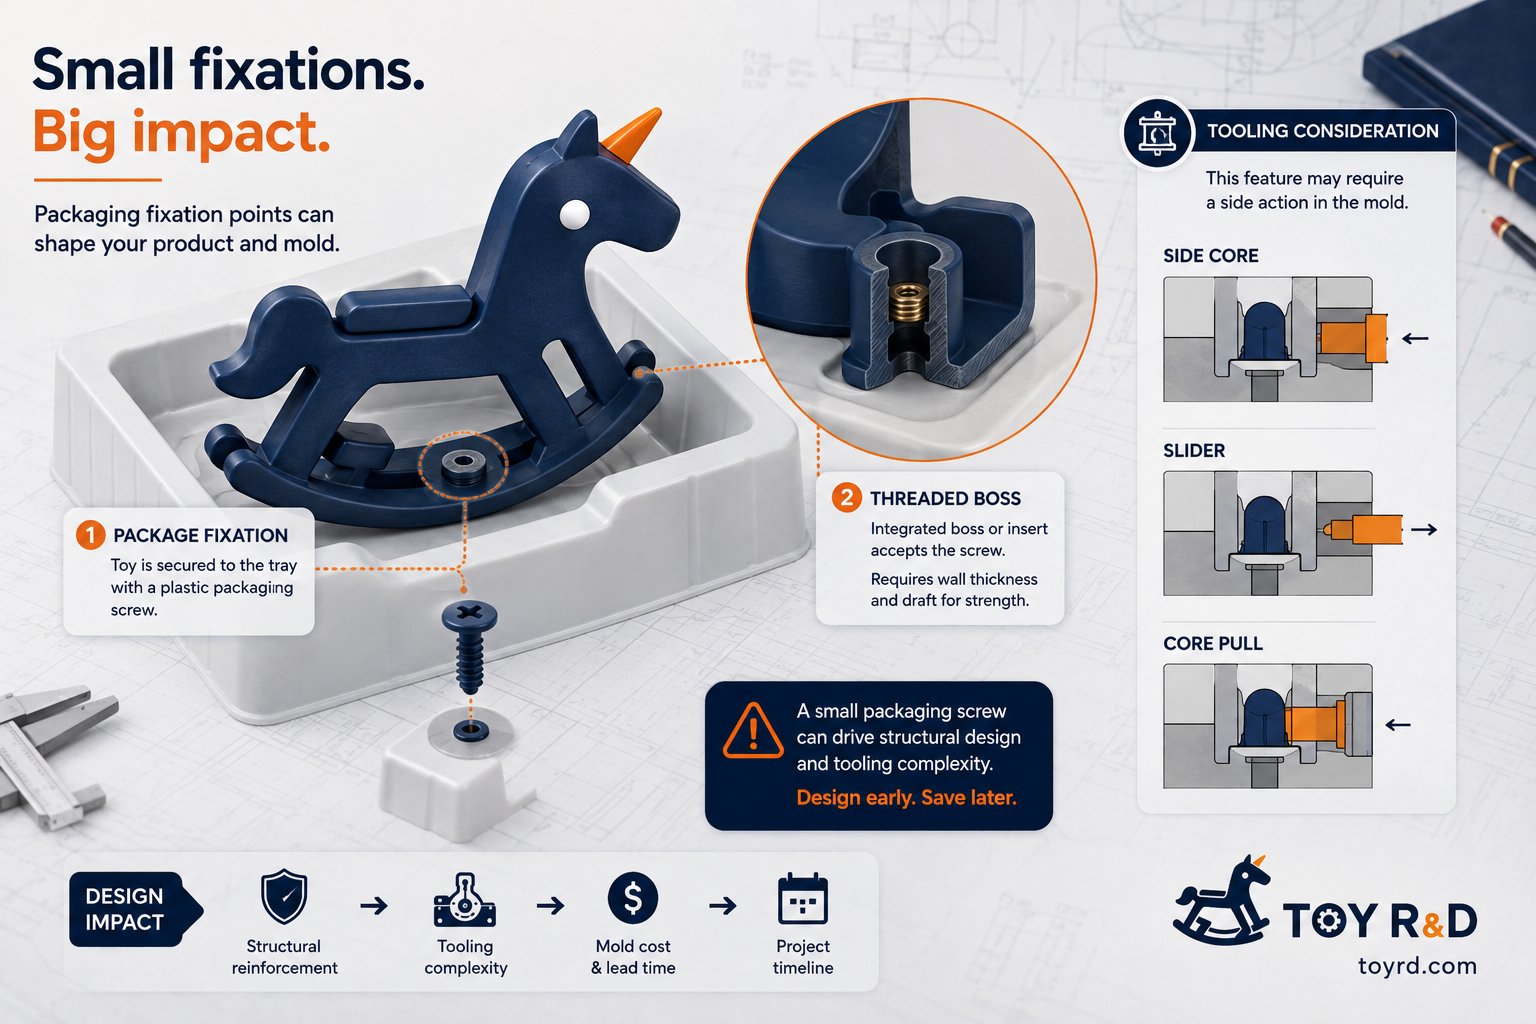
One common way to secure a product onto an inner tray is to use a plastic fixing screw from the rear or bottom of the tray.
From the packaging side, it looks like a very small component.
From the mechanical engineering side, however, the situation is different.
If the packaging screw needs to engage with the product, the product itself must include a matching feature.
It could be thought of as:
a threaded interface, screw boss, or nut-like fixing structure designed specifically for packaging.
Now consider what happens if that fixing feature is not aligned with the normal mold opening direction.
The tool may require:
- side actions,
- sliders,
- lifters,
- core pulls,
- or another special demolding mechanism.
Suddenly, a tiny packaging screw has started to influence the mold architecture.
That is exactly why this requirement must be discussed before the tooling design is finalized.
5. The Real Problem Is Not Just the Cost of Mold Modification
A common response is:
If we need it later, can’t we just modify the mold?
Sometimes yes.
But sometimes the answer is no.
Once a mold has been designed and built, the core steel, mold base, cooling channels, ejector layout, sliders, and surrounding mechanisms have already occupied most of the available space.
If the original tool was never designed for a side core or additional fixing structure, a late change may create problems such as:
- insufficient steel around the required area,
- no room for a slider mechanism,
- interference with cooling channels,
- interference with ejector pins,
- collision with internal product structures,
- insufficient mold strength,
- excessive modification cost.
The worst-case scenario is not simply that the mold modification becomes expensive.
The real worst case is:
the existing mold no longer has a practical way to create the required feature at all.
At that point, the team may be forced to choose between several bad options:
- redesign the packaging,
- redesign the product,
- accept a weaker retail presentation,
- develop a more complicated fixing method,
- or, in extreme cases, rebuild tooling.
All of this may have been avoided if the packaging fixation point had been considered before tooling started.
6. Packaging Is Not the Last Step of Product Development
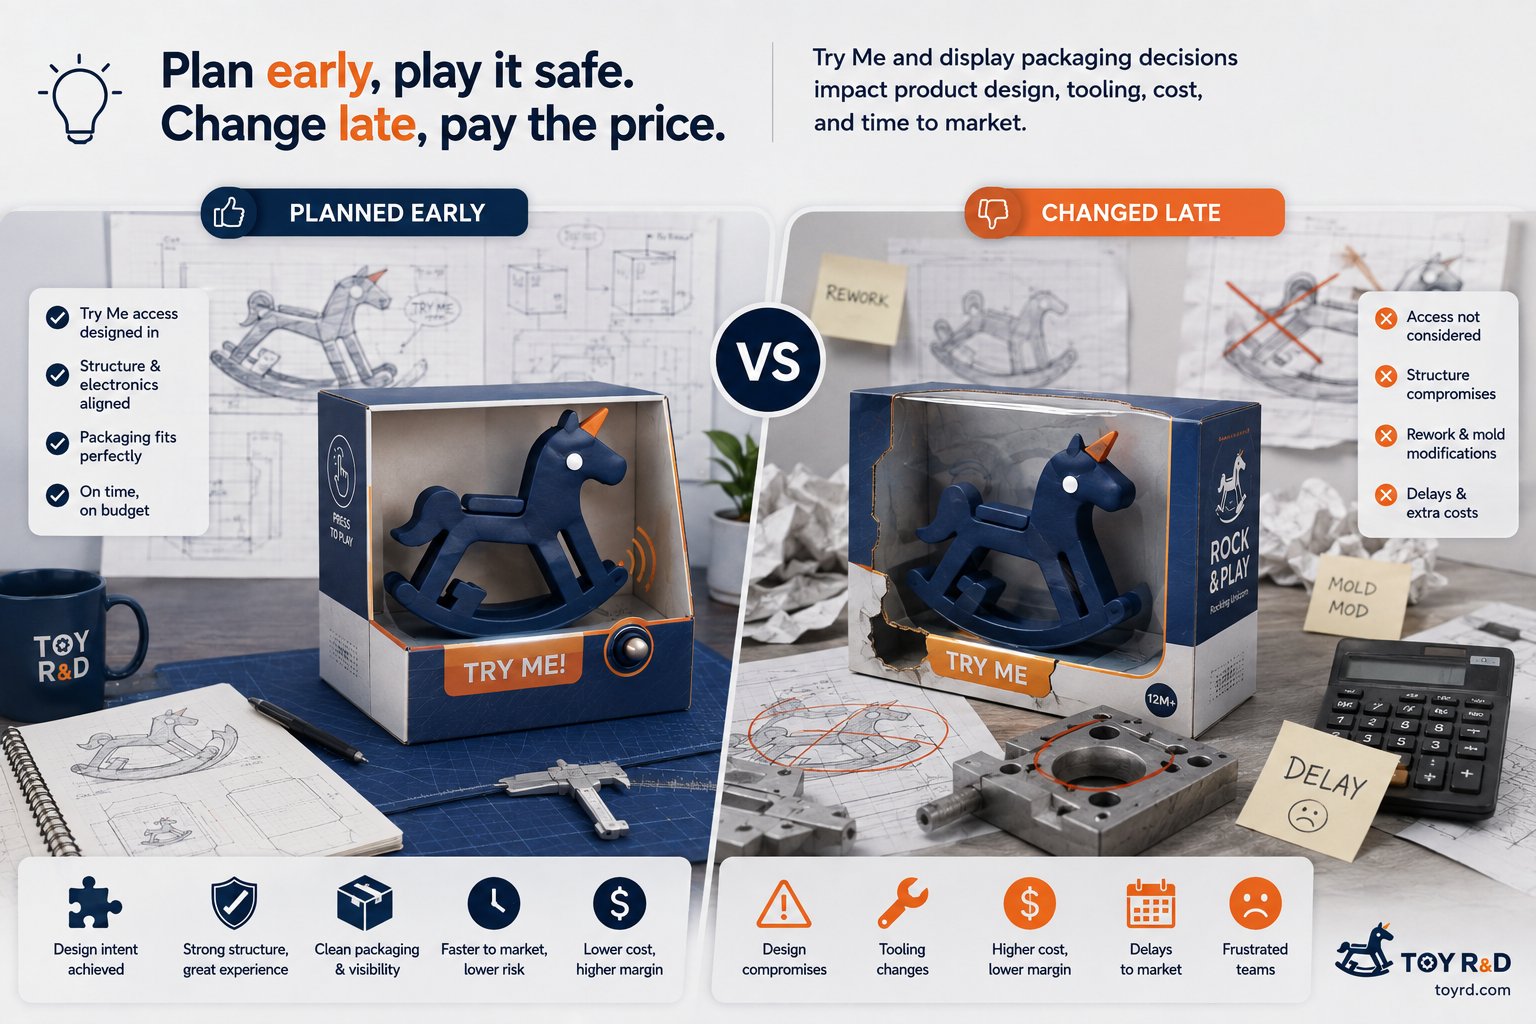
A common development mindset looks like this:
Product design → Mechanical design → Tooling → Production → Packaging
When teams think in this sequence, packaging naturally feels like something that can be solved at the end.
For retail toys, that is often a mistake.
A better way to think about it is:
Packaging is part of the product system.
Packaging decisions may determine:
- whether the product needs a Try Me function,
- which controls must remain accessible,
- how the product is presented,
- how the product is restrained,
- whether packaging screws are required,
- where fixation points must be located,
- whether the mold requires side actions,
- whether the product can survive shipping while maintaining its presentation,
- and whether the final retail display achieves the intended visual effect.
Some packaging decisions therefore need to be made before the mold is designed, not after.
7. Two Questions We Prefer to Ask Early
At ToyRD, these are the kinds of questions that are worth discussing before the mechanical design is finalized.
Question 1: Does the product need a Try Me function?
If the answer is yes, continue asking:
- Where will the customer interact with the product through the packaging?
- Can the existing product button be reached?
- Is a dedicated Try Me button required?
- Does the PCB need an additional connector or input?
- Does a wire need to extend from the product to the package?
- Is a dedicated Demo Mode required?
- Will any of these requirements affect the external design or internal structure?
The earlier these questions are answered, the easier the implementation becomes.
Question 2: How will the product be displayed and fixed inside the package?
If the product will use a window box or display-oriented package, consider:
- What position should the product maintain?
- Can it move during transportation?
- Is an inner tray enough?
- Can cable ties solve the problem?
- Is a plastic packaging screw needed?
- If so, where will the screw engage with the product?
- Does the fixing feature affect the mold opening direction?
- Is a slider, lifter, or core pull required?
If any of the answers affect the tool structure, the requirement belongs in the early engineering review.
8. Small Requirements Can Become Large Problems
Toy development is full of details like this.
The original requirement may be tiny:
- one button,
- one hole,
- one cable,
- one screw,
- one threaded feature.
But once that small requirement crosses the boundaries between packaging, product design, electronics, mechanical engineering, and tooling, its impact can grow very quickly.
Experienced product development is not only about solving difficult problems later.
It is also about identifying them while they are still cheap to solve.
Adding a small structural feature before tooling may take only a few minutes of CAD work.
Adding the same feature after tooling is complete may require a mold modification.
And sometimes, the existing mold may not be able to support the change at all.
So if a toy may require a Try Me function, a window box, or a display-style package, do not wait until the packaging artwork starts.
These decisions belong much earlier in the product-development process.
Because in toy development:
Packaging may be produced near the end, but packaging requirements should never be designed at the end.
Have a question or a correction? Send feedback on this article.
Was this article helpful?
Your feedback helps improve these field notes.
No account needed. Your choice is remembered in this browser. Privacy policy